


In this post we will explain how to authenticate an API using tokens, which will help ensure that users who use our services have permissions to do so and are who they say they are.
- Create an API rest with Spring Boot.
- Protect resources published in the API.
- Implement a controller to authenticate users and generate an access token.
- Implement a filter to authorize requests to access protected resources within our API.
Basic Concepts
Before beginning, it is important to understand some basic concepts that will appear throughout this post:
- Server: Application that contains the resources protected by REST API.
- Client: Application that makes requests to the server to interact with the protected resources.
- Authentication: Process through which a client confirms their identity. A simple example would be the use of a username and password.
- Authorization: Process through which it is determined if a client has authority or authorization to access certain protected resources.
What is JWT?
JSON Based Token (JWT https://jwt.io/) is a JSON-based open source standard for creating access tokens that allow us to secure communications between client and server.
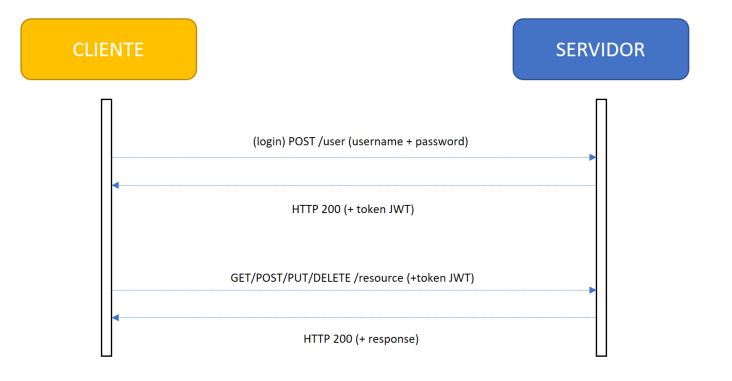
How does it work?
- The client is authenticated and their identity confirmed through a request to the authentication server. This request could be by means of password, external providers (Google, Facebook, etc.), or other services such as LDAP, Active Directory, etc.
- Once the authentication server confirms the identity of the client, an access token (JWT) is generated.
- The client uses that token to access the protected resources published through API.
- For each request, the server decrypts the token and confirms if the client has permissions to access the resource by making a request to the authorization server.
We therefore have three servers: that of our API, as well as the authentication and authorization servers. However, as we will see in this post, we can implement all three functionalities in a single application.
Token Composition
These tokens are composed of three parts:
- Header: contains the hash that is used to encrypt the token
- Payload: contains a series of attributes (key, value) that are encrypted in the token
- Signature: contains concatenated and encrypted header and payload (Header ₊ “.”₊ Payload ₊ Secret key)
Let’s dive in…
The best way to understand it is to see it in action, so let’s do exactly that! The first thing would be to create a Spring Boot application to implement our API. We already did this in the webinar “Building a REST API with Spring Boot. (spanish)”
Creating a Spring Boot application
First we access the Spring Initializr website and generate a Maven project with Java and Spring Boot 2.1.1. Then we fill in the group and the artifact (in this case “es.softtek” and “jwt-demo”), and lastly, add dependencies to the application.
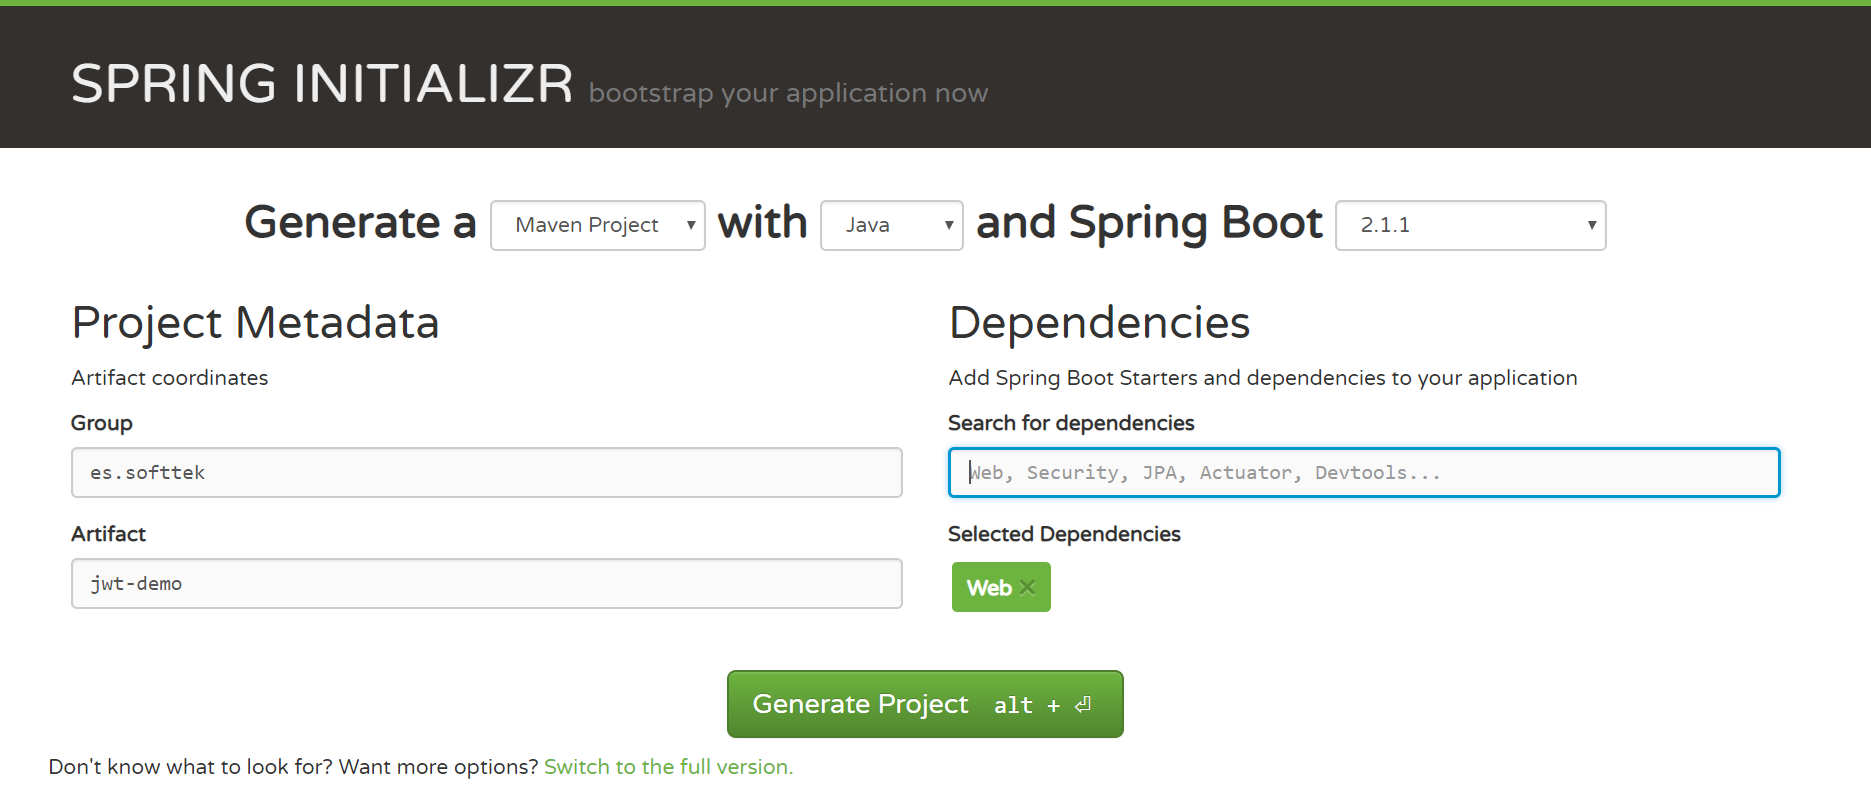
Once generated, we unpack the zip and build it executing the “mvn package” command on the root of our project. Next, we generate our .project file by executing the command “mvn eclipse:eclipse” from the same location. Once compiled and built, we import the project into our IDE.
Implementing our API
Now we create a REST controller to respond to all endpoint / hello invocations, which simply returns a default welcome message to all customers who are authorized to access the service.
package es.softtek.jwtDemo.controller;

import org.springframework.web.bind.annotation.RequestMapping;
import org.springframework.web.bind.annotation.RequestParam;
import org.springframework.web.bind.annotation.RestController;

@RestController
public class HelloWorldController {

	@RequestMapping("hello")
	public String helloWorld(@RequestParam(value="name", defaultValue="World") String name) {
		return "Hello "+name+"!!";
	}
}
In essence, we have used the following annotations:
- @RestController to enable this class as a REST controller and allow it to intercept requests to the server
- @RequestMapping to enable this method to intercept a call to the server, in this case to /hello
- @RequestParam to enable this argument as a service parameter
If we start the application (executing the “mvn spring-boot:run” command from the root of our application) we can test our service. At this point, we haven’t added any security settings, so we can invoke the service without restrictions.
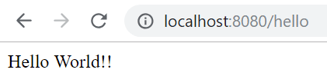
If we invoke the endpoint of our service (http://localhost:8080/hello), it will return the default message:
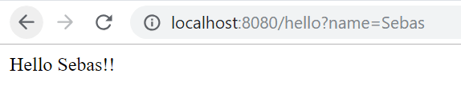
We can also indicate a name invoking the same service, but adding our parameter (http://localhost:8080hello?name=sebas):
Next, we are going to add security settings to our application to protect the endpoint /hello that we just implemented:
Dependencies
First we need to add the dependencies for Spring Security and JWT:

Authentication
Now we will create another REST controller to implement the authentication process through a username/password login:
package es.softtek.jwtDemo.controller;

import java.util.Date;
import java.util.List;
import java.util.stream.Collectors;

import org.springframework.security.core.GrantedAuthority;
import org.springframework.security.core.authority.AuthorityUtils;
import org.springframework.web.bind.annotation.PostMapping;
import org.springframework.web.bind.annotation.RequestParam;
import org.springframework.web.bind.annotation.RestController;

import es.softtek.jwtDemo.dto.User;
import io.jsonwebtoken.Jwts;
import io.jsonwebtoken.SignatureAlgorithm;

@RestController
public class UserController {

	@PostMapping("user")
	public User login(@RequestParam("user") String username, @RequestParam("password") String pwd) {

		String token = getJWTToken(username);
		User user = new User();
		user.setUser(username);
		user.setToken(token);
		return user;

	}

	private String getJWTToken(String username) {
		String secretKey = "mySecretKey";
		List<GrantedAuthority> grantedAuthorities = AuthorityUtils
				.commaSeparatedStringToAuthorityList("ROLE_USER");

		String token = Jwts
				.builder()
				.setId("softtekJWT")
				.setSubject(username)
				.claim("authorities",
						grantedAuthorities.stream()
								.map(GrantedAuthority::getAuthority)
								.collect(Collectors.toList()))
				.setIssuedAt(new Date(System.currentTimeMillis()))
				.setExpiration(new Date(System.currentTimeMillis() + 600000))
				.signWith(SignatureAlgorithm.HS512,
						secretKey.getBytes()).compact();

		return "Bearer " + token;
	}
}
The login(…) method will intercept the POST requests to the endpoint /user and receive the user and password as parameters. As you can see, no user and password validation is performed in this example, so we allow any value of these parameters to pass through. Obviously, for a real project, at this point we would authenticate the user against our database or any external provider.
We use the getJWTToken(…) method to build the token, delegating the Jwts in the utility class that includes information about its expiration and a Spring GrantedAuthority object that, as we will see later, will be used to authorize requests to protected resources.
Finally, we will edit our boot class JwtDemoApplication to add the following configuration:
package es.softtek.jwtDemo;

import org.springframework.boot.SpringApplication;
import org.springframework.boot.autoconfigure.SpringBootApplication;
import org.springframework.context.annotation.Configuration;
import org.springframework.http.HttpMethod;
import org.springframework.security.config.annotation.web.builders.HttpSecurity;
import org.springframework.security.config.annotation.web.configuration.EnableWebSecurity;
import org.springframework.security.config.annotation.web.configuration.WebSecurityConfigurerAdapter;
import org.springframework.security.web.authentication.UsernamePasswordAuthenticationFilter;

import es.softtek.jwtDemo.security.JWTAuthorizationFilter;

@SpringBootApplication
public class JwtDemoApplication {

	public static void main(String[] args) {
		SpringApplication.run(JwtDemoApplication.class, args);
	}

	@EnableWebSecurity
	@Configuration
	class WebSecurityConfig extends WebSecurityConfigurerAdapter {

		@Override
		protected void configure(HttpSecurity http) throws Exception {
			http.csrf().disable()
				.addFilterAfter(new JWTAuthorizationFilter(), UsernamePasswordAuthenticationFilter.class)
				.authorizeRequests()
				.antMatchers(HttpMethod.POST, "/user").permitAll()
				.anyRequest().authenticated();
		}
	}

}
The WebSecurityConfig, decorated with @EnableWebSecurity and @Configuration, allows us to specify the access configuration to published resources. In this case, all calls to the controller /user are allowed, but all other calls require authentication.
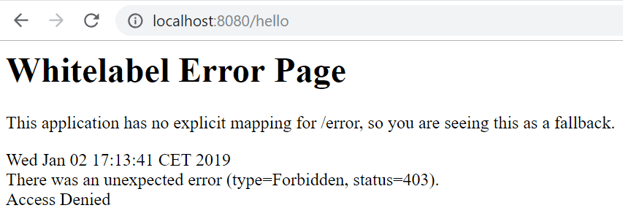
At this time, if we restart the application and make a call to http://localhost:8080/hello, it will return an error 403 informing the user that they are not authorized to access the protected resource.
Authorization
Now we need to implement the authorization process, which is capable of intercepting invocations to protected resources to recover the token and determine if the client has permissions or not.
To do this, we will implement the JWTAuthorizationFilter:
package es.softtek.jwtDemo.security;

import java.io.IOException;
import java.util.List;
import java.util.stream.Collectors;

import javax.servlet.FilterChain;
import javax.servlet.ServletException;
import javax.servlet.http.HttpServletRequest;
import javax.servlet.http.HttpServletResponse;

import org.springframework.security.authentication.UsernamePasswordAuthenticationToken;
import org.springframework.security.core.authority.SimpleGrantedAuthority;
import org.springframework.security.core.context.SecurityContextHolder;
import org.springframework.web.filter.OncePerRequestFilter;

import io.jsonwebtoken.Claims;
import io.jsonwebtoken.ExpiredJwtException;
import io.jsonwebtoken.Jwts;
import io.jsonwebtoken.MalformedJwtException;
import io.jsonwebtoken.UnsupportedJwtException;

public class JWTAuthorizationFilter extends OncePerRequestFilter {

	private final String HEADER = "Authorization";
	private final String PREFIX = "Bearer ";
	private final String SECRET = "mySecretKey";

	@Override
	protected void doFilterInternal(HttpServletRequest request, HttpServletResponse response, FilterChain chain) throws ServletException, IOException {
		try {
			if (checkJWTToken(request, response)) {
				Claims claims = validateToken(request);
				if (claims.get("authorities") != null) {
					setUpSpringAuthentication(claims);
				} else {
					SecurityContextHolder.clearContext();
				}
			}else {
				SecurityContextHolder.clearContext();
			}
			chain.doFilter(request, response);
		} catch (ExpiredJwtException | UnsupportedJwtException | MalformedJwtException e) {
			response.setStatus(HttpServletResponse.SC_FORBIDDEN);
			((HttpServletResponse) response).sendError(HttpServletResponse.SC_FORBIDDEN, e.getMessage());
			return;
		}
	}

	private Claims validateToken(HttpServletRequest request) {
		String jwtToken = request.getHeader(HEADER).replace(PREFIX, "");
		return Jwts.parser().setSigningKey(SECRET.getBytes()).parseClaimsJws(jwtToken).getBody();
	}

	/**
	 * Authentication method in Spring flow
	 *
	 * @param claims
	 */
	private void setUpSpringAuthentication(Claims claims) {
		@SuppressWarnings("unchecked")
		List<String> authorities = (List) claims.get("authorities");

		UsernamePasswordAuthenticationToken auth = new UsernamePasswordAuthenticationToken(claims.getSubject(), null,
				authorities.stream().map(SimpleGrantedAuthority::new).collect(Collectors.toList()));
		SecurityContextHolder.getContext().setAuthentication(auth);

	}

	private boolean checkJWTToken(HttpServletRequest request, HttpServletResponse res) {
		String authenticationHeader = request.getHeader(HEADER);
		if (authenticationHeader == null || !authenticationHeader.startsWith(PREFIX))
			return false;
		return true;
	}

}
This filter intercepts all calls to the server (extended from OncePerRequestFilter) and:
- Checks the existence of the token (checkJWTToken(…))
- If it exists, it decrypts and validates (validateToken(…))
- If everything is ok, it adds the necessary configuration to the Spring context to authorize the request (setUpStringAuthentication(…))
For this last point, the GrantedAuthority object that was included in the token is used during the authentication process.
Testing our API
Once we have implemented the authentication and authorization logic, we will retest our API.
To do so, we can use Postman, a simple Chrome extension that allows us to execute and monitor requests.
- We start our server by executing the command “mvn spring-boot:run”
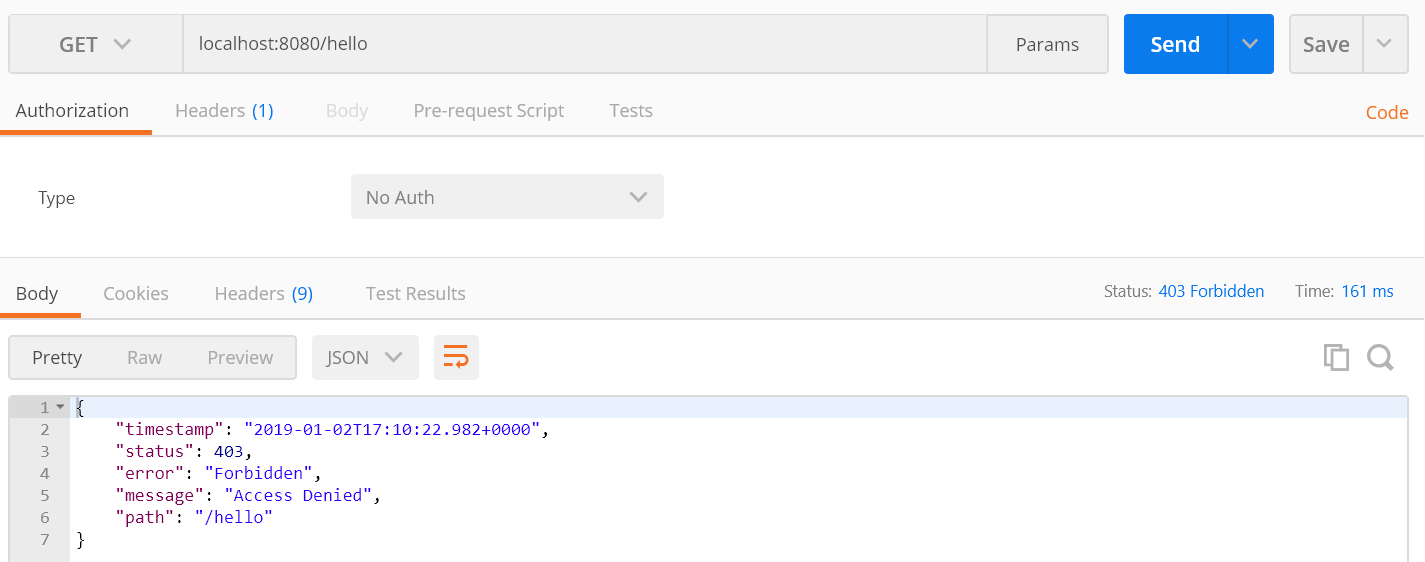
- From Postman, we make a GET request to /hello and verify that it gives us a 403, since the resource is protected
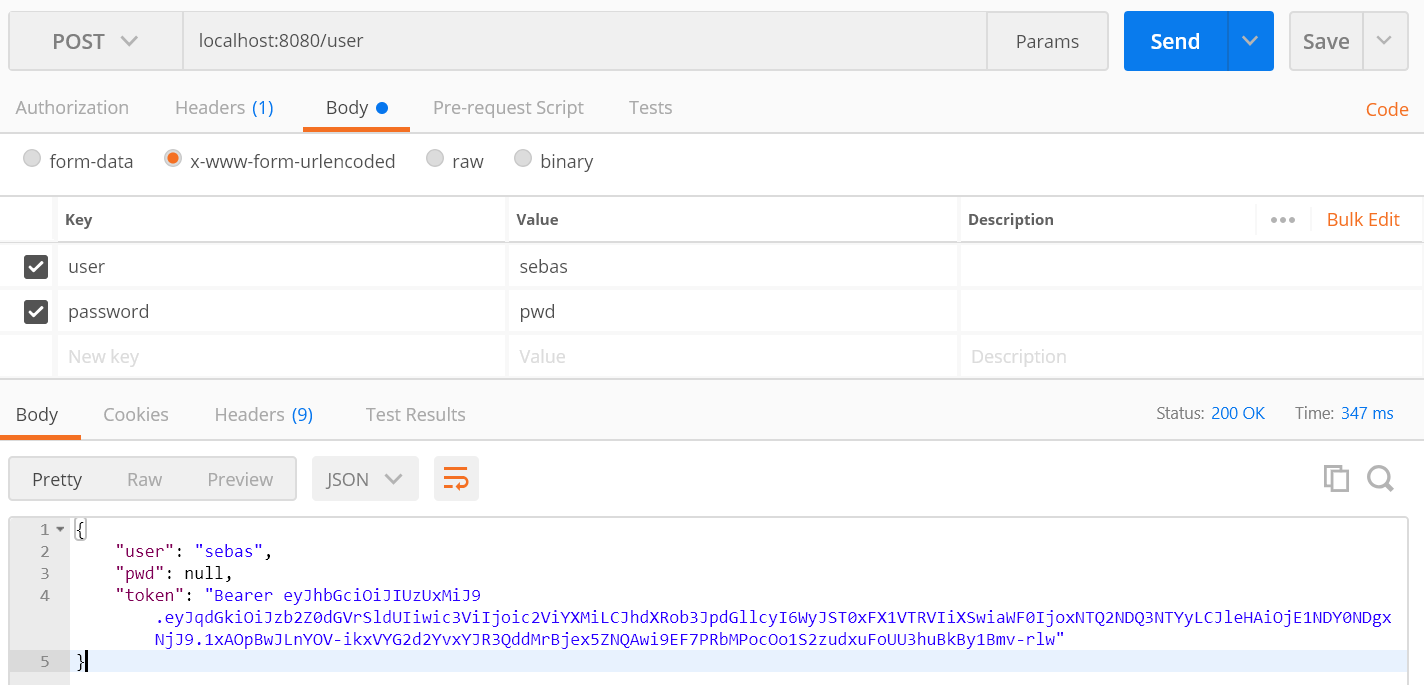
- From Postman, we make a POST request to /user to authenticate, including username and password, and we obtain an access token:
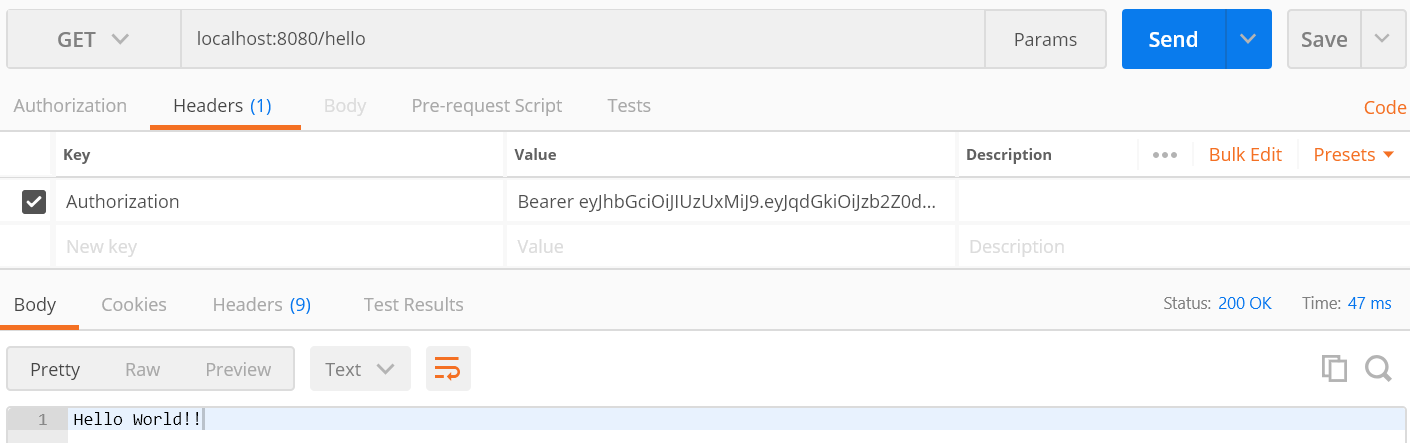
- We make the GET request again from step 2, including an Authorization with the token generated in step 3
Conclusions
We have demonstrated a simple way to authenticate and authorize requests to a REST API built with Java and Spring Boot.
In later posts, we will see how to control the life cycle of our tokens and generate exceptions, and we will implement the authentication logic to validate our username and password against a database.
The application code is published on my Github.
Thank you very much for reading this post. I hope it was useful! For any questions or queries, you can use the comments section below.


